1.Head
0 / 14 rangs terminés
Nombre de mailles par tour
6 → 30 → 6 sts
Diagramme de mailles
Symboles de crochet standard pour ce tour — lecture dans le sens horaire depuis le haut.
Ordre écrit
6 sc in MR (6)
×6
Légende
- MR
- sc

Intermédiaire · Gratuit
Un mignon sachet hibou amigurumi de 7" réalisé en fil DK, avec une pochette amovible pour lavande à cordon. Comprend un petit masque de sommeil amovible qui sert aussi de boucle de suspension — extérieur lavable, pochette amovible pour lavande séchée.
Techniques
Parcours
Suivez le parcours de la première pièce au projet fini. Touchez une étape pour y aller.
Pièces crochetées
Détails & finitions
Chaque pièce numérotée se crochète à part, puis s’assemble.
Couleurs suggérées
Les couleurs indiquées sont des suggestions — choisissez celles que vous préférez.
Étapes visuelles
La mosaïque suit le parcours — chaque panneau correspond à une étape du modèle.
Avant de commencer
Toutes les pièces s’enchaînent. Choisissez tableau, un par un, ou liste — enregistré sur cet appareil.
0 / 14 rangs terminés
Nombre de mailles par tour
6 → 30 → 6 sts
Diagramme de mailles
Symboles de crochet standard pour ce tour — lecture dans le sens horaire depuis le haut.
Ordre écrit
6 sc in MR (6)
Légende
0 / 14 rangs terminés
Nombre de mailles par tour
6 → 36 → 6 sts
Diagramme de mailles
Symboles de crochet standard pour ce tour — lecture dans le sens horaire depuis le haut.
Ordre écrit
6 sc in MR (6)
Légende
0 / 7 rangs terminés
Nombre de mailles par tour
6 → 18 → 6 sts
Diagramme de mailles
Symboles de crochet standard pour ce tour — lecture dans le sens horaire depuis le haut.
Ordre écrit
6 sc in MR (6)
Légende
0 / 4 rangs terminés
0 / 2 pièces faites
Nombre de mailles par tour
6 → 12 → 12 → 12 sts
Diagramme de mailles
Symboles de crochet standard pour ce tour — lecture dans le sens horaire depuis le haut.
Ordre écrit
6 sc in MR (6)
Légende
0 / 3 rangs terminés
Nombre de mailles par rang
3 → 2 → 1 sts
Diagramme de mailles
Diagramme en rangs avec symboles standard — lecture de gauche à droite.
Rang 1 · left → right
3 sts
ch ×4
sc ×3
Ordre écrit
ch 4, sc across (3) — foundation row
Légende
0 / 4 rangs terminés
0 / 2 pièces faites
Nombre de mailles par tour
4 → 8 → 8 → 4 sts
Diagramme de mailles
Symboles de crochet standard pour ce tour — lecture dans le sens horaire depuis le haut.
Ordre écrit
4 sc in MR (4)
Légende
0 / 7 rangs terminés
Détails de cette pièce
Drawstring
Nombre de mailles par tour
6 → 18 sts
Diagramme de mailles
Symboles de crochet standard pour ce tour — lecture dans le sens horaire depuis le haut.
Ordre écrit
6 sc in MR (6)
Légende
0 / 4 rangs terminés
Étape 1 sur 3
Row 1
ch 13, sc across (12) — foundation row
Astuces débutant
Détails de cette pièce
Hanging loop
Nombre de mailles par rang
12 sts each
Diagramme de mailles
Diagramme en rangs avec symboles standard — lecture de gauche à droite.
Rang 1 · left → right
12 sts
ch ×13
sc ×12
Ordre écrit
ch 13, sc across (12) — foundation row
Légende
Place the body and head ready for joining. If you worked head and body separately, stuff both firmly but leave an opening large enough to insert the lavender pouch.
Insert the filled removable lavender pouch into the body. If using loose dried herbs, place a small fabric circle between pouch and stuffing first.
Align the head opening to the body opening. With right sides together, whipstitch or use mattress stitch around the opening to join head to body invisibly. Stuff more if needed before final stitches.
Sew the belly appliqué centered on the front lower chest with matching thread: baste with small whipstitches around the edge so it sits flat.
Position and sew wings to the sides of the body, slightly angled toward the front. Anchor with several secure stitches.
Sew the beak centered above the belly (under where the mask may sit); secure with several stitches.
Sew ear tufts to top corners of head. Make sure both are symmetrical and firmly attached.
If using safety eyes, ensure they were installed before assembly. If embroidering eyes, do so now using secure stitches and weave ends inside.
fasten off; leave long tail for sewing and attaching to body or for closing when assembling
Place 8–10 mm safety eyes between head rounds 7 and 8, approximately 6–8 stitches apart; or embroider closed sleepy eyes using black floss after assembly
If using safety eyes, install before stuffing the head and securing the opening. For embroidered eyes, mark placement and embroider after sewing head and body together or before stuffing as preferred.
Assemble pieces and sew together
See detailed assembly steps in Assembly section.
Weave in all ends securely with a yarn needle. Trim excess tails.
Hide any remaining knots inside the body or head where possible.
Attach sleeping mask with a small snap at two points or tuck the back edge under the beak and secure with a removable stitch so it can be taken off to reveal the face. The chain loop can be used to hang the owl as a sachet or ornament.
If you added loose lavender to the pouch, close the drawstring and tuck the pouch inside the body. Replace pouch as needed for refreshing scent.
Give a final fluff and shape the owl. Check all attachments to ensure they are secure, especially if the item will be handled by children.

Joli sac bandoulière structuré, crocheté en fil mélange coton de poids DK, avec un panneau ombré rose poudré → pêche → crème et un visage de lama endormi brodé. Comprend une selle amovible ornée d'un pompon et d'un gland, une poche intérieure à pression pour pièces, des instructions pour une doublure légère en coton et des notes sur la quincaillerie pour une finition soignée.
View pattern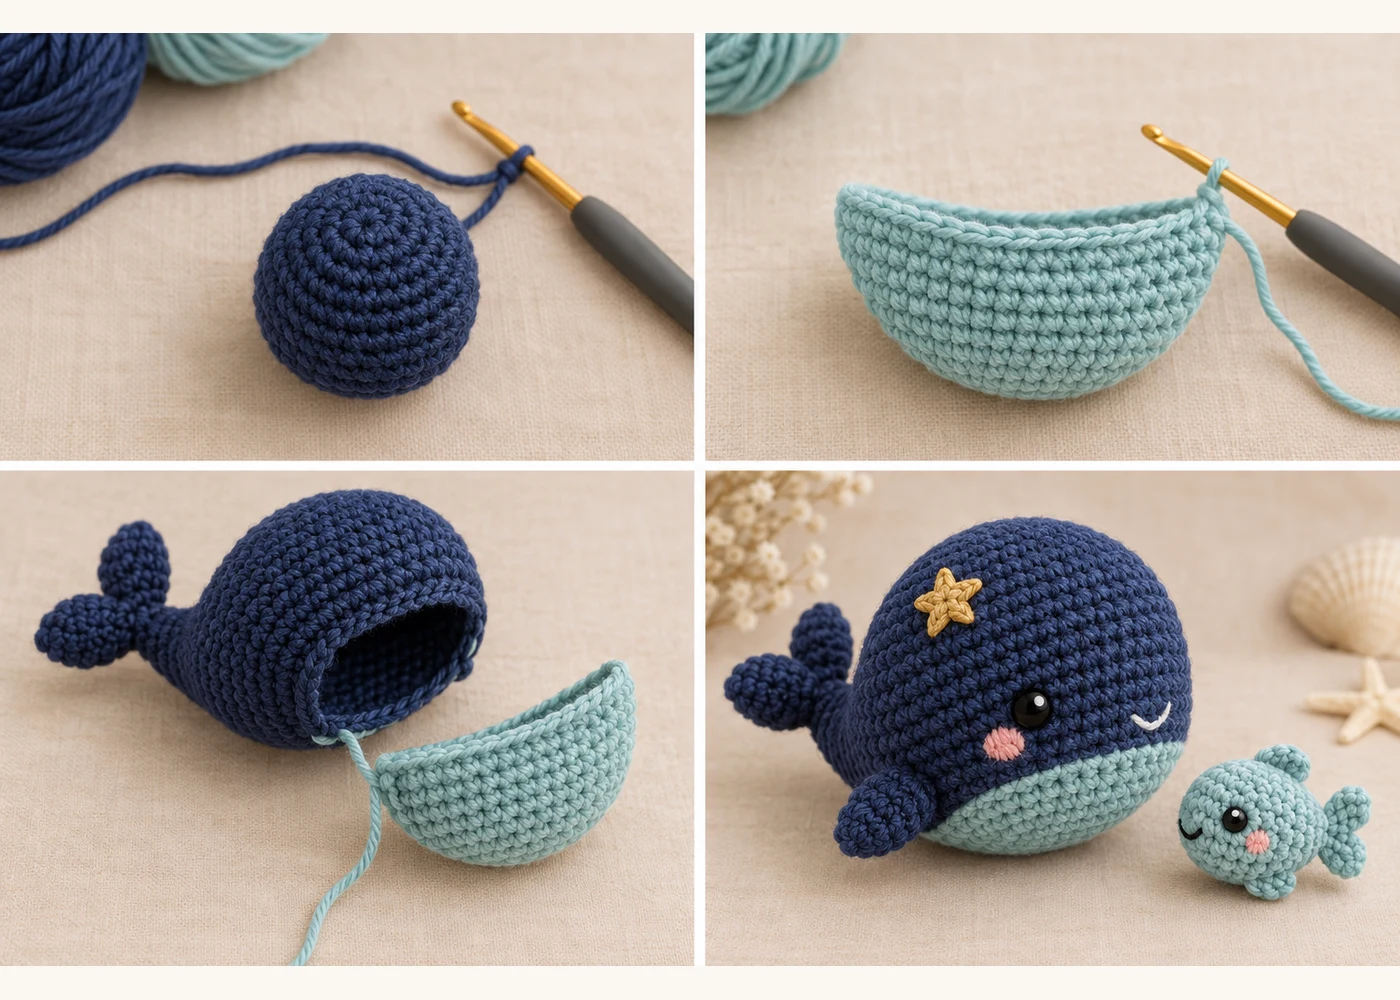
Une mignonne baleine amigurumi de poche de 6" (15 cm) réalisée en bleu marine doux avec un ventre vert-menthe pastel, des joues brodées en rose et une petite étoile appliquée dorée. Comprend un petit poisson amovible de 1,5" qui se clipse dans une poche ventrale cachée et une petite boucle crochetée pour un porte-clés ou un mousqueton.
View pattern