1.Head
0 / 14 vueltas hechas
Puntos por ronda
6 → 30 → 6 sts
Diagrama de puntos
Símbolos de crochet estándar para esta ronda — se lee en sentido horario desde arriba.
Orden escrito
6 sc in MR (6)
×6
Leyenda
- MR
- sc

Intermedio · Gratis
Un lindo saquito aromático amigurumi de búho de 7" tejido con hilo de peso DK y con una bolsita extraíble para lavanda con cordón. Incluye una pequeña máscara de dormir extraíble que también sirve como lazo para colgar — exterior lavable; la bolsita se puede extraer para lavanda seca.
Técnicas
Ruta
Sigue la ruta desde la primera pieza hasta el proyecto terminado. Toca un paso para saltar.
Piezas a crochet
Detalles y acabados
Cada pieza numerada se teje aparte y luego se une al proyecto final.
Colores sugeridos
Los colores mostrados son sugerencias — usa los que prefieras.
Pasos visuales
El collage sigue la ruta — cada panel corresponde a una etapa del patrón.
Antes de empezar
Todas las piezas van en orden. Elige panel, una a una, o lista — se guarda en este dispositivo.
0 / 14 vueltas hechas
Puntos por ronda
6 → 30 → 6 sts
Diagrama de puntos
Símbolos de crochet estándar para esta ronda — se lee en sentido horario desde arriba.
Orden escrito
6 sc in MR (6)
Leyenda
0 / 14 vueltas hechas
Puntos por ronda
6 → 36 → 6 sts
Diagrama de puntos
Símbolos de crochet estándar para esta ronda — se lee en sentido horario desde arriba.
Orden escrito
6 sc in MR (6)
Leyenda
0 / 7 vueltas hechas
Puntos por ronda
6 → 18 → 6 sts
Diagrama de puntos
Símbolos de crochet estándar para esta ronda — se lee en sentido horario desde arriba.
Orden escrito
6 sc in MR (6)
Leyenda
0 / 4 vueltas hechas
0 / 2 piezas hechas
Puntos por ronda
6 → 12 → 12 → 12 sts
Diagrama de puntos
Símbolos de crochet estándar para esta ronda — se lee en sentido horario desde arriba.
Orden escrito
6 sc in MR (6)
Leyenda
0 / 3 vueltas hechas
Paso 1 de 4
Row 1
ch 4, sc across (3) — foundation row
Consejos para principiantes
Puntos por fila
3 → 2 → 1 sts
Diagrama de puntos
Diagrama en filas con símbolos estándar — se lee de izquierda a derecha.
Fila 1 · left → right
3 sts
ch ×4
sc ×3
Orden escrito
ch 4, sc across (3) — foundation row
Leyenda
0 / 4 vueltas hechas
0 / 2 piezas hechas
Puntos por ronda
4 → 8 → 8 → 4 sts
Diagrama de puntos
Símbolos de crochet estándar para esta ronda — se lee en sentido horario desde arriba.
Orden escrito
4 sc in MR (4)
Leyenda
0 / 7 vueltas hechas
Detalles de esta pieza
Drawstring
Puntos por ronda
6 → 18 sts
Diagrama de puntos
Símbolos de crochet estándar para esta ronda — se lee en sentido horario desde arriba.
Orden escrito
6 sc in MR (6)
Leyenda
0 / 4 vueltas hechas
Paso 1 de 3
Row 1
ch 13, sc across (12) — foundation row
Consejos para principiantes
Detalles de esta pieza
Hanging loop
Puntos por fila
12 sts each
Diagrama de puntos
Diagrama en filas con símbolos estándar — se lee de izquierda a derecha.
Fila 1 · left → right
12 sts
ch ×13
sc ×12
Orden escrito
ch 13, sc across (12) — foundation row
Leyenda
Place the body and head ready for joining. If you worked head and body separately, stuff both firmly but leave an opening large enough to insert the lavender pouch.
Insert the filled removable lavender pouch into the body. If using loose dried herbs, place a small fabric circle between pouch and stuffing first.
Align the head opening to the body opening. With right sides together, whipstitch or use mattress stitch around the opening to join head to body invisibly. Stuff more if needed before final stitches.
Sew the belly appliqué centered on the front lower chest with matching thread: baste with small whipstitches around the edge so it sits flat.
Position and sew wings to the sides of the body, slightly angled toward the front. Anchor with several secure stitches.
Sew the beak centered above the belly (under where the mask may sit); secure with several stitches.
Sew ear tufts to top corners of head. Make sure both are symmetrical and firmly attached.
If using safety eyes, ensure they were installed before assembly. If embroidering eyes, do so now using secure stitches and weave ends inside.
fasten off; leave long tail for sewing and attaching to body or for closing when assembling
Place 8–10 mm safety eyes between head rounds 7 and 8, approximately 6–8 stitches apart; or embroider closed sleepy eyes using black floss after assembly
If using safety eyes, install before stuffing the head and securing the opening. For embroidered eyes, mark placement and embroider after sewing head and body together or before stuffing as preferred.
Assemble pieces and sew together
See detailed assembly steps in Assembly section.
Weave in all ends securely with a yarn needle. Trim excess tails.
Hide any remaining knots inside the body or head where possible.
Attach sleeping mask with a small snap at two points or tuck the back edge under the beak and secure with a removable stitch so it can be taken off to reveal the face. The chain loop can be used to hang the owl as a sachet or ornament.
If you added loose lavender to the pouch, close the drawstring and tuck the pouch inside the body. Replace pouch as needed for refreshing scent.
Give a final fluff and shape the owl. Check all attachments to ensure they are secure, especially if the item will be handled by children.

Lindo bolso bandolera estructurado tejido a crochet con hilo mezclado de algodón de grosor DK, con un panel ombré rosa empolvado→durazno→crema y una cara de llama somnolienta bordada. Incluye una montura removible con borla y pompón, un bolsillo interior para monedas con broche a presión, instrucciones para un forro interior ligero de algodón y notas sobre herrajes para un acabado pulido.
View pattern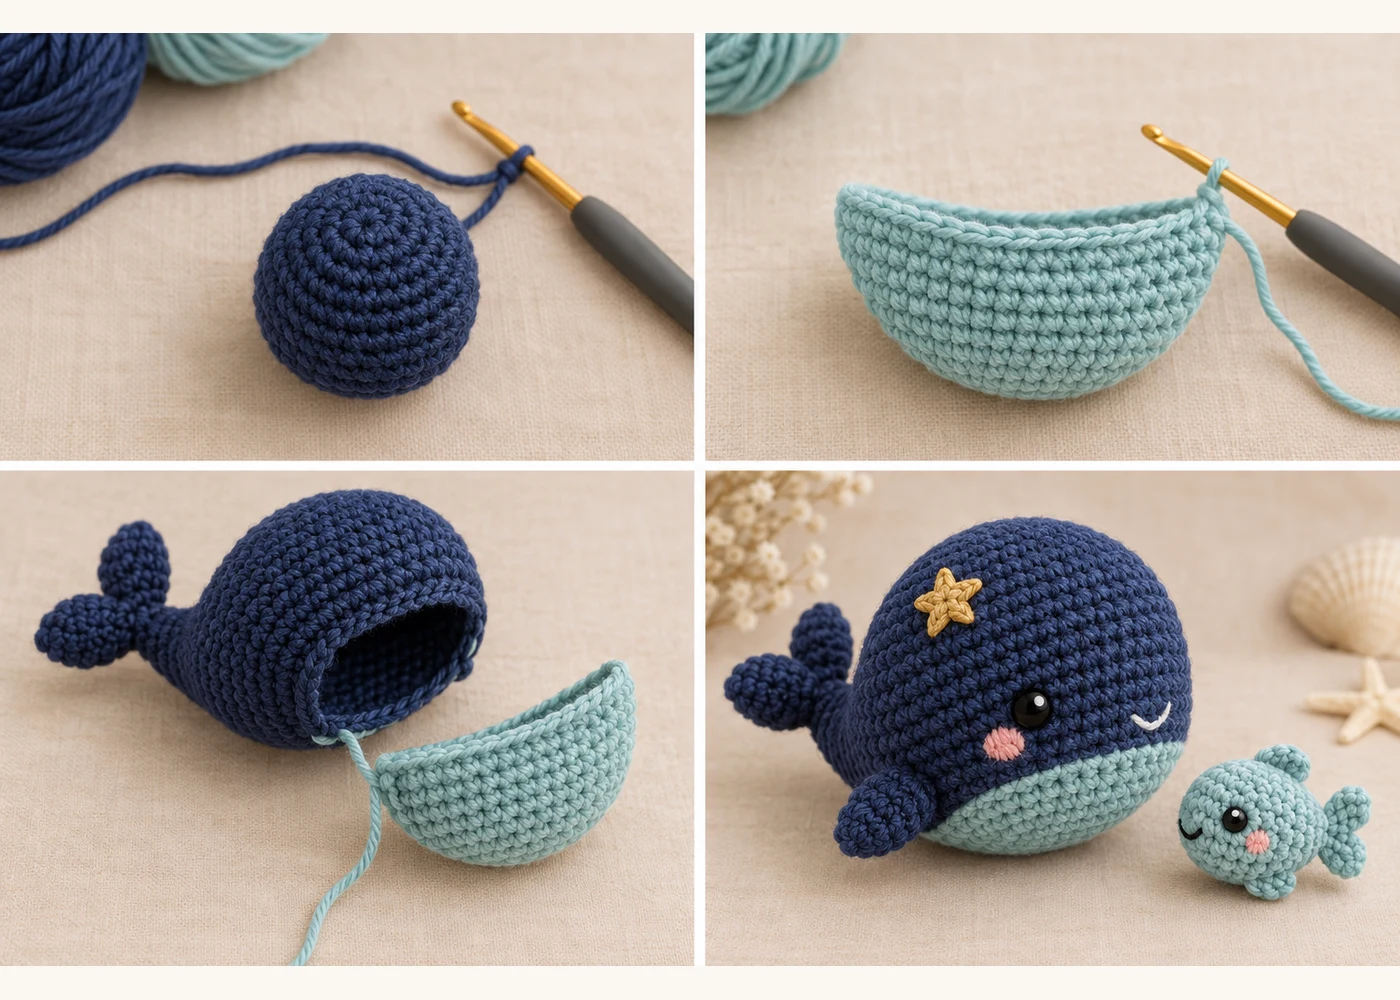
Una adorable ballena amigurumi de bolsillo de 6" (15 cm) tejida en azul marino suave con vientre verde azulado pastel, mejillas bordadas con rubor y un pequeño apliqué de estrella dorada. Incluye un pececito desmontable de 1.5" que se abrocha en un bolsillo oculto del vientre y un pequeño lazo tejido para llavero o mosquetón.
View pattern