Bobble stitch (bo)
Several incomplete tall stitches closed together (differs from popcorn).
Vertical Short — phone-shaped 9:16 player.
Step by step
8 steps
- 1
Join new color with ss in the first stitch
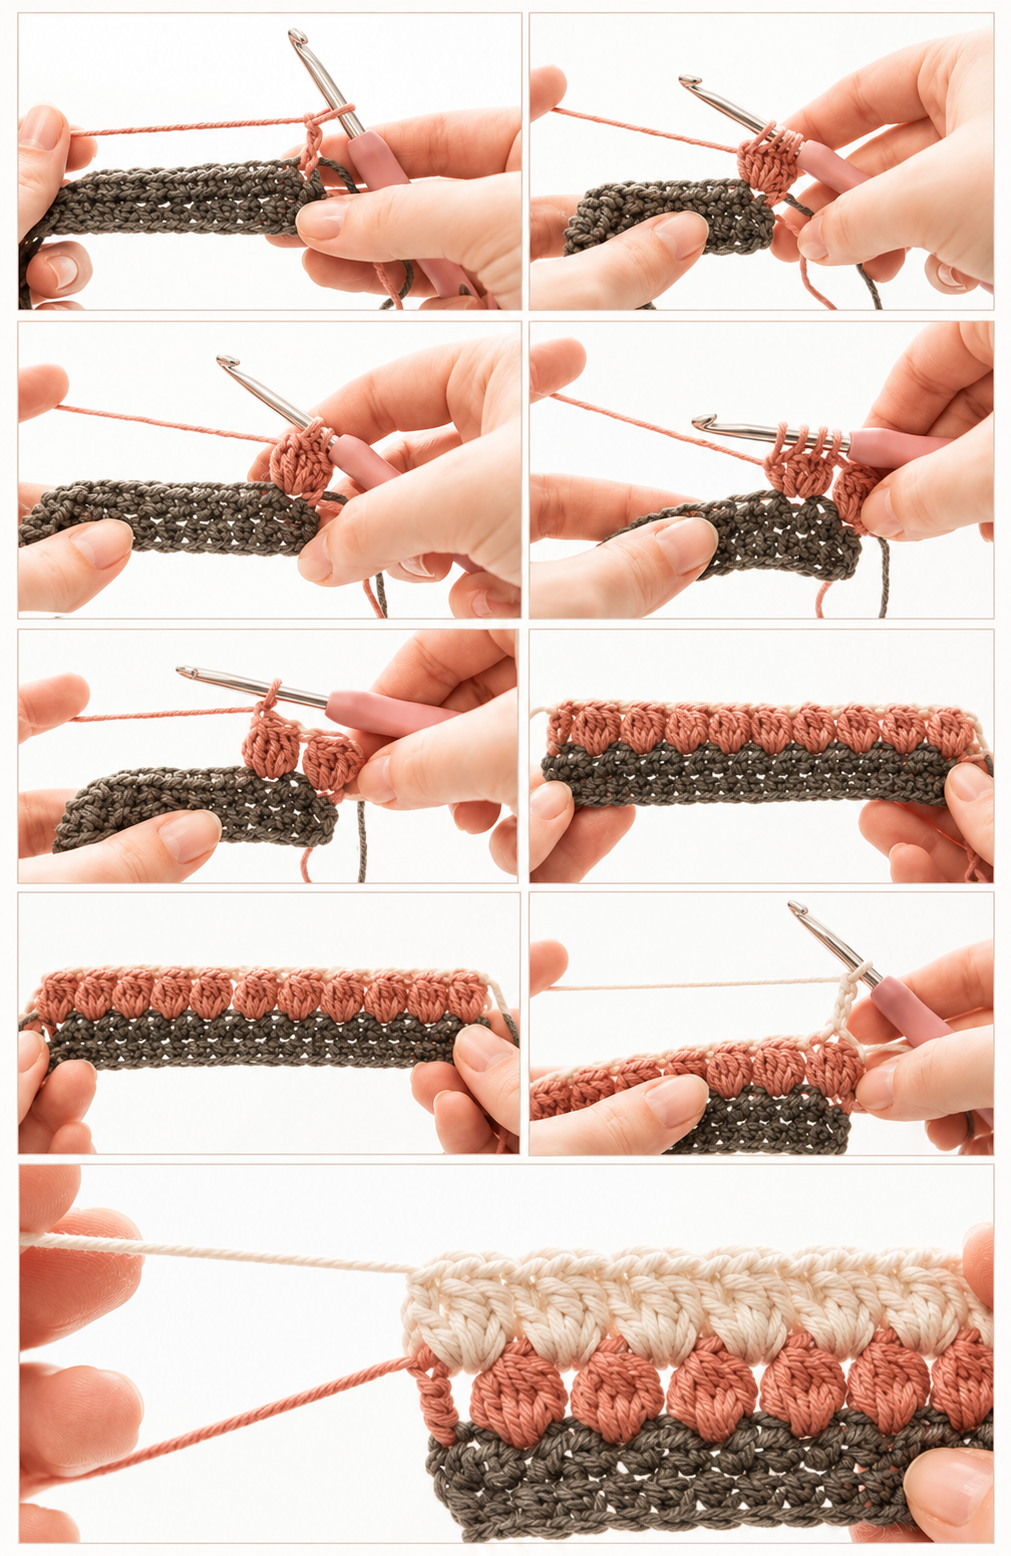
Insert hook into the first stitch of the previous row (the begin-bobble when repeating), pull up a loop and work a ss to join. (Do not join in the last stitch.)
- 2
Chain 2 to set up the begin-bobble (or ch 3 to start a following row)
For the first bobble row chain 2 (this replaces the first half-finished dc used in the begin-bobble). When working the return row, use ch 3 to count as a dc.
- 3
Make the begin-bobble in the same stitch as the ss
In the same stitch: yo, insert hook, yo pull up a loop, yo pull through first two loops on hook. Repeat that partial-step until there are four loops total on your hook, then yo and pull through all loops to close the begin-bobble.
- 4
Ch 1, skip 1 stitch
Chain 1 and skip the next stitch so the bobbles will sit in every other stitch across the row.
- 5
Make a standard bobble
In the target stitch do this partial tall-stitch sequence (yo, insert, yo pull up loop, yo pull through first two loops) four times in the same stitch so several incomplete stitches sit on the hook; then yo and pull through all loops to close the bobble.
- 6
Work bobble, ch1, skip across row; finish with dc and fasten off
Alternate: bobble in the next available stitch, ch 1 and skip 1 stitch across the row. In the final stitch work a dc. Cut the yarn and do not turn the blanket (the bobble side will face out).
- 7
Start the return row: join with ss in the first (begin-)bobble, ch 3 and work bobbles between previous bobbles
Join with ss in the first stitch (the begin-bobble), then ch 3 (counts as dc). Make a bobble in each space between the bobbles from the row below, placing ch 1 between bobbles. Finish with a dc in the final stitch, cut the yarn and do not turn.
- 8
Repeat these two rows until desired height; keep bobbles pointing the same way
Alternate the begin-bobble row (steps 1–6) and the return row (step 7) until your blanket reaches the height you want. Always join the new color in the first stitch (begin-bobble) so all bobbles point the same direction.